![Rogo logo - full colour without Eintech@2x.png]](https://help-guide.eintech.com/hs-fs/hubfs/Rogo%20eintech%20design%20toolkit/Rogo%20Logos/Rogo%20logo%20-%20full%20colour%20without%20Eintech@2x.png?height=50&name=Rogo%20logo%20-%20full%20colour%20without%20Eintech@2x.png)
Adding Users
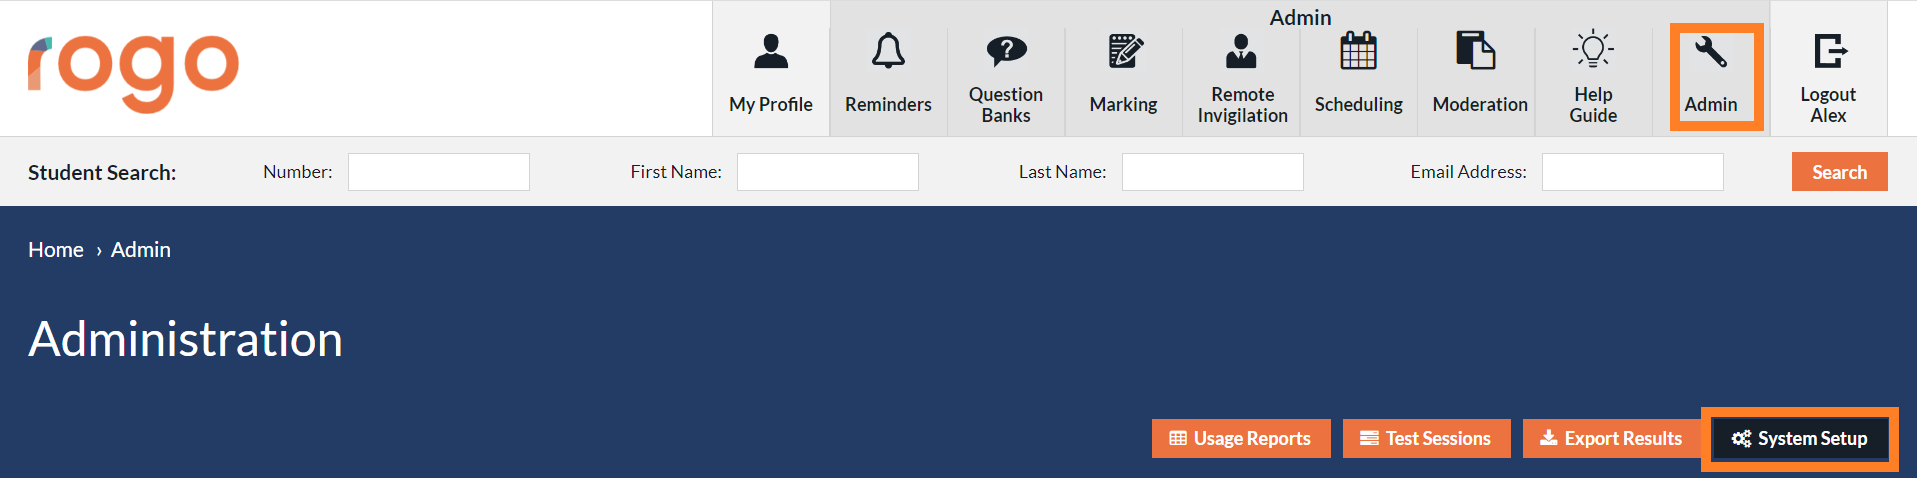
Go to the Admin – System Setup section and click on ‘Add’ under the Users section of the System Setup heading.

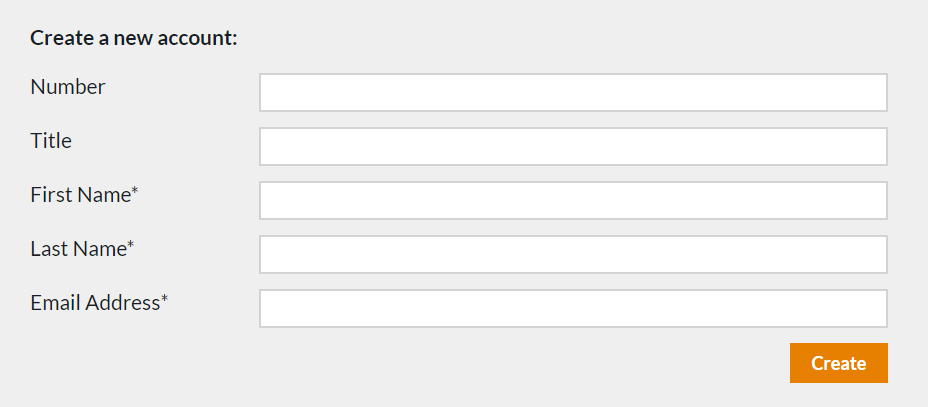
Fill in the form with the user’s information to create the account. You will then be able to assign them to one or multiple roles.

Importing Users
If your instance uses New admin go to Admin then System Setup and click on Bulk Upload Users on the Users tab, and those who have the current ‘System Setup’ page, should add /Admin/Users/Import/ to their URL to reach this page. You will then be able to upload a .csv file with all user information, please note you won't be able to assign a scope to the user role when using the bulk import.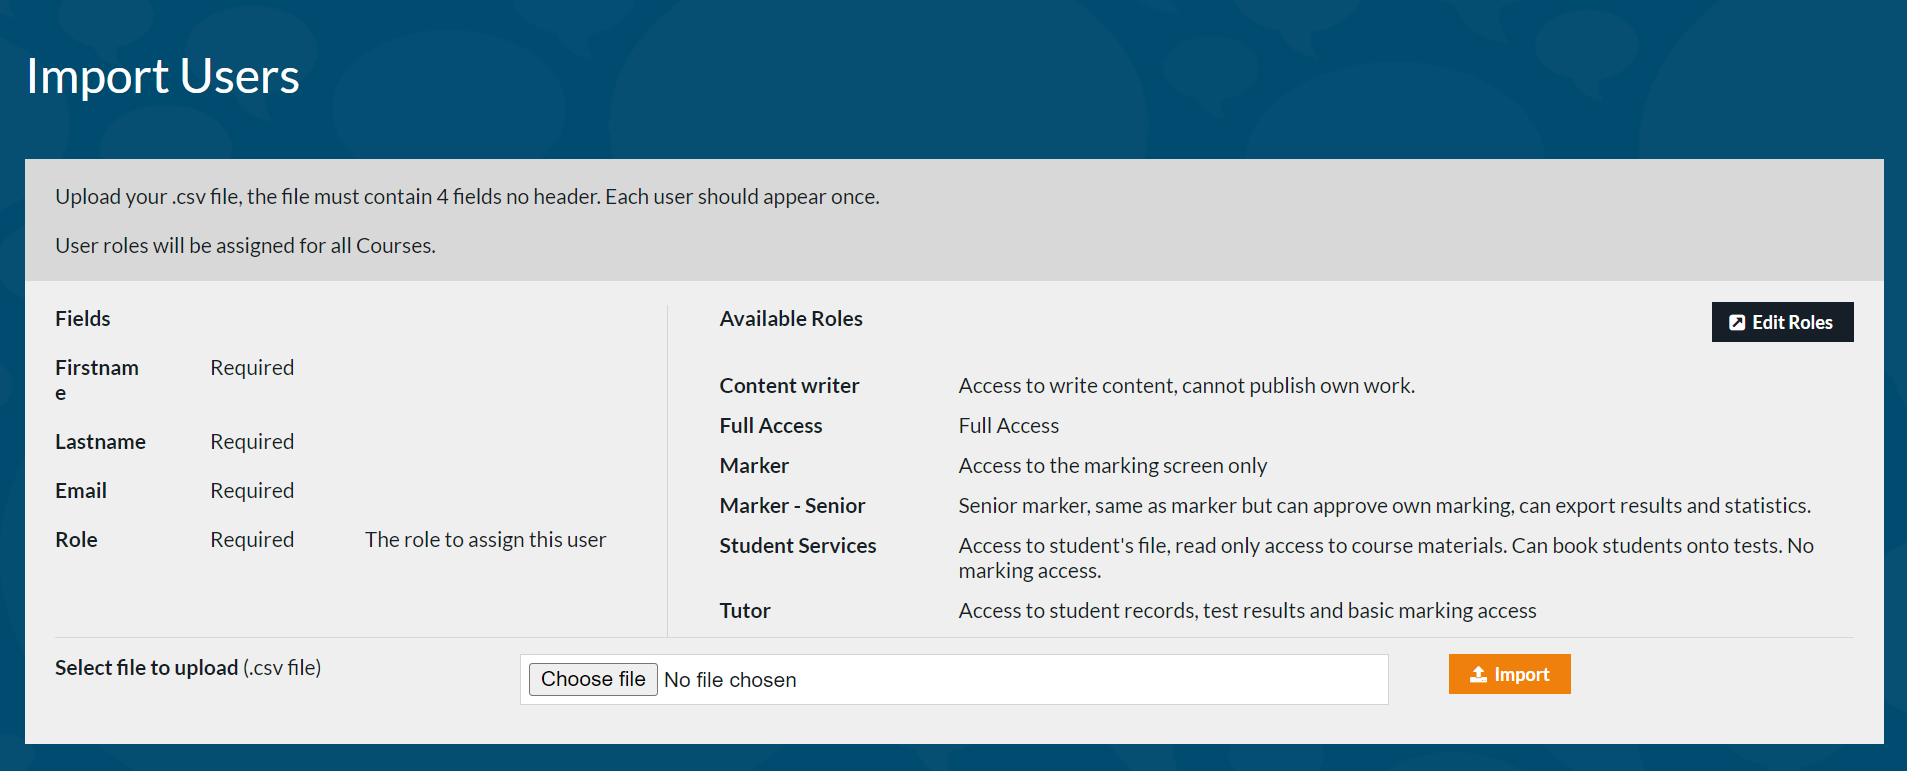
User Roles
You can view, edit or add a new user role to Rogo; go to the System Setup section and click on ‘User Roles’ under the System Setup heading. Here you can view all current roles and create new ones with custom permissions; permissions control what your users have access to, e.g. you may only want to give test authors permission to create and edit exercises but not to view student data. After adding a user role you will need to select a scope to give the user access to specific courses or chapters. 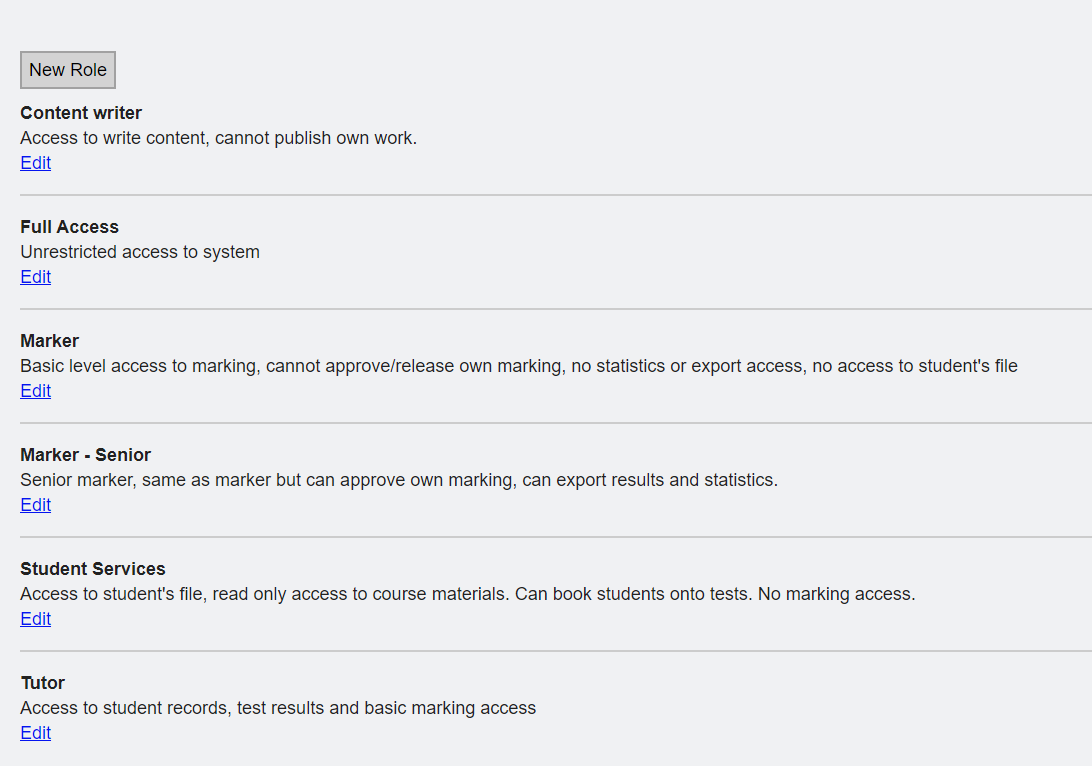 Disabling Users
To disable a user, you can either remove their permissions which will keep their record active allowing them to enrol on courses, or you can disable their entire record which will prevent them from logging in completely. To disable their record, you would need to go into their profile and click on disable.