![Rogo logo - full colour without Eintech@2x.png]](https://help-guide.eintech.com/hs-fs/hubfs/Rogo%20eintech%20design%20toolkit/Rogo%20Logos/Rogo%20logo%20-%20full%20colour%20without%20Eintech@2x.png?height=50&name=Rogo%20logo%20-%20full%20colour%20without%20Eintech@2x.png)
Creating a Session
Once you are on one of the sessions pages mentioned above you will be able to create a new session. 
Session Types
There are 3 types of Sessions – however, you may not have all these options depending on your portal settings.
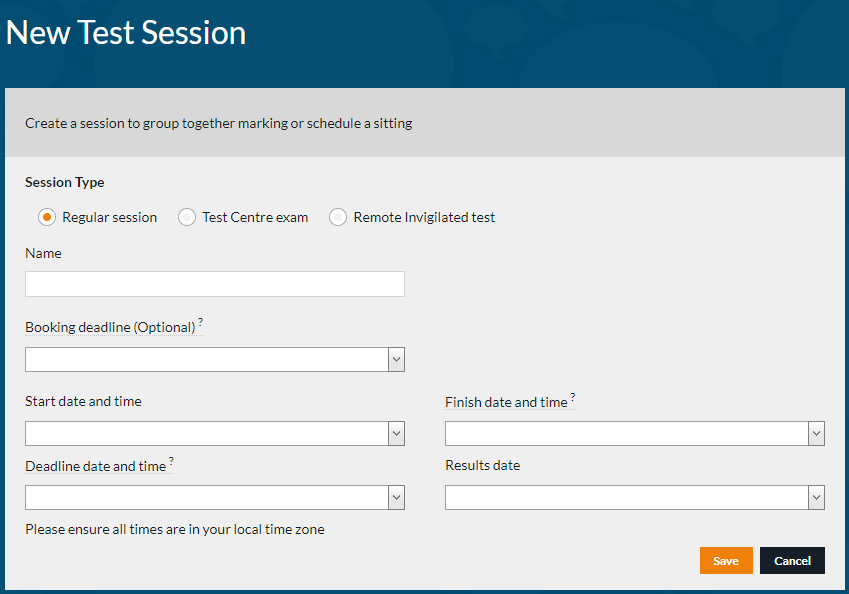
Regular Session: most commonly used if you want the students to sit an exercise within a set time period without giving them any additional restrictions.
Test Centre exam: used when a session will be done in a test centre using the Rogo Kiosk, or if local invigilators are used in the self-scheduling flow below.
Remote Invigilated test: would create a session which uses Rogo’s built in invigilation feature, you will be able to set the type of invigilation and which security measures you want to use.
Session Date and Times
The Booking deadline option will only be visible if the student scheduling option is enabled. It is the date by which they can schedule their exam. The Start date and time is the earliest time a session can be started. Deadline date and time is the time given to students of when the exercise must be submitted. The Finish date and time is the latest time at which a student will have access to the session, this can be set to the same as the deadline or can be later if you want to give some leeway. The Results date give students an idea of when they should expect their result.
These dates and times are available for all session types, however, the Deadline, Finish and Result date and times are optional for the ‘Test Centre exam’ and ‘Remote Invigilated test’ sessions. If you don't set the deadline or finish times then they will by default set to 24 hours after the start time.
Bulk Creating Sessions
You can also create sessions in bulk rather than creating them individually. Reach the sessions page as above and click on Import CSV.

Full instructions on how to layout the CSV can be found on the import page by clicking on ‘Import Instructions’, you can also download a template file from this page. 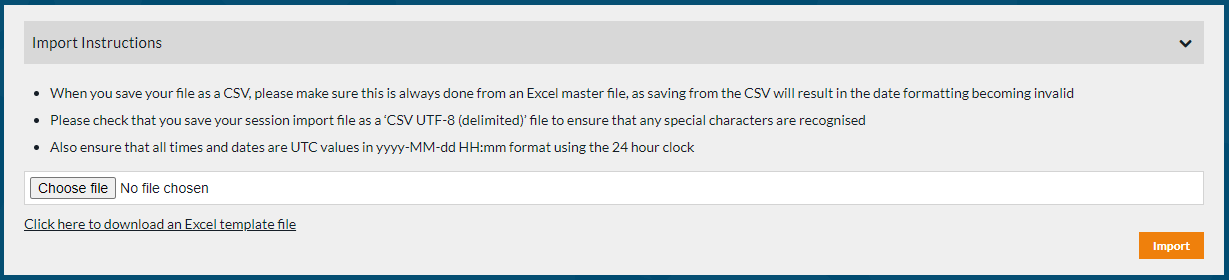
Student Self-Scheduling
Student self-scheduling allows you to create sessions and have students add themselves to those sessions so that they can choose when they want to sit their exam. An exercise would need to have the ‘Requires Session’ exercise setting enabled for this to work.
This feature is not automatically available and will need to be switched on for individual instances of Rogo, if this is functionality you are interested in using, please contact Support (Support@eintech.com) for further details.
Session List
To view a full list of all sessions first go to the Admin area and then click on Test Sessions.
![]()

Specific Exercise
If you only want to see the sessions for a specific exercise go to the course view and select Marking on the relevant exercise, as long as the exercise has been released you will then be able to access the Sessions tab.
Specific time period
For relevance, the session page displays the last 6 months of sessions as default. Any older ones are available behind the ‘Include Historical’ checkbox.
However, you can specify the amount of time after which a session counts as historical on your portal.

If you would like to change this time period, then please contact support@eintech.com.
Marker Allocation in a Session
You have the option to add one or more markers to the session, this will auto-assign an equal share of the completed scripts to these markers.

Adding Your Students
Once your session has been created you can add your students to it, this can be done in two ways. You can either search for the students you want to add to the session or upload a spreadsheet of students to add. Note that a student must be added to Rogo before they can be added to a session.
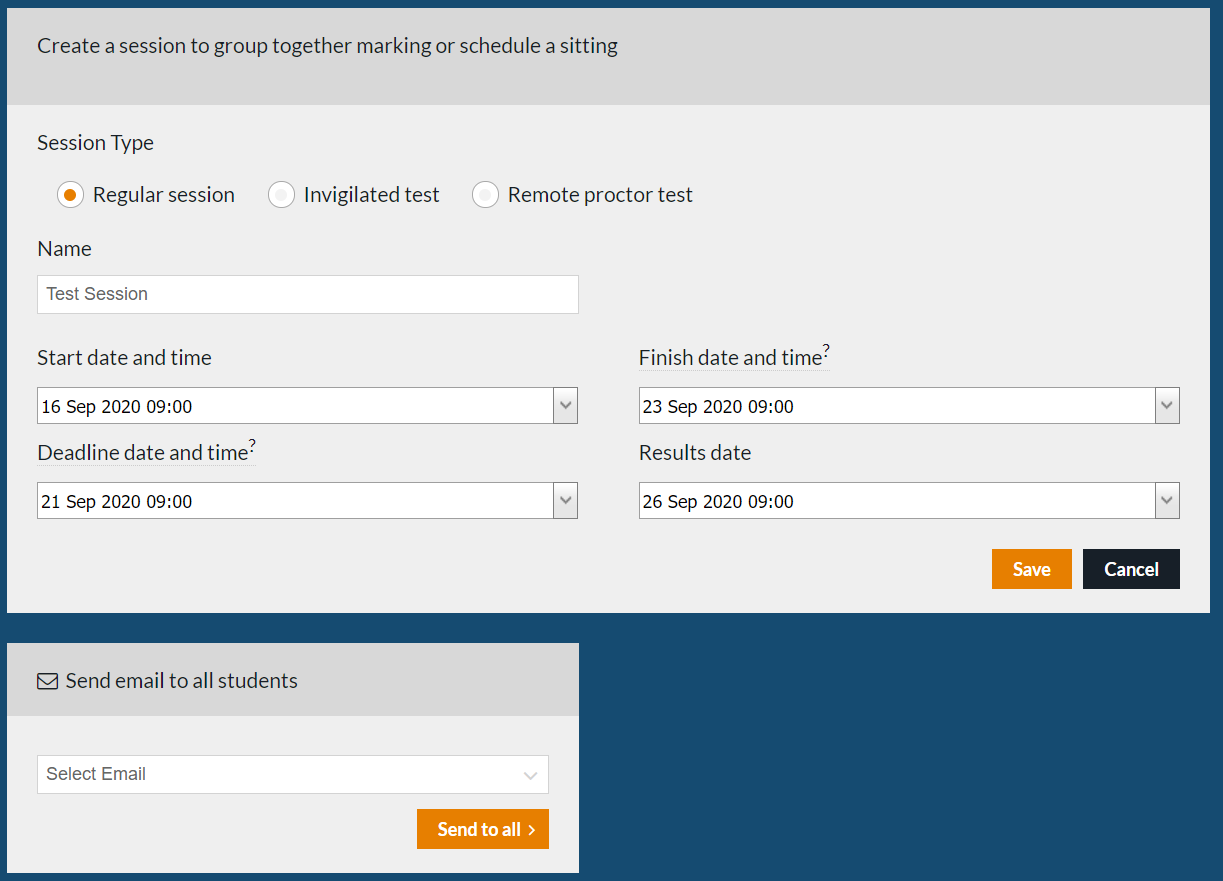
Sessions Emails
After you have added your students to the session, you also have the option to send an ‘Exercise Attempt’ type email. If you want to send this to all students then use the Send email to all students section, if you want to send an email to individual students then you can click on the envelope next to their name.
This email could simply be a confirmation email that the session has been booked or you could also include an auto-login start link so the student doesn’t have to login to start the session.
Adding Extra Time
If your student requires extra time to be added to their exam attempt then you can do this from the exercise attempt page. This page can either be reached from the session page, by clicking on the clock next to the students name or from the students profile by clicking on ‘View’ next to the exercise they are currently completing.

You can either add a pre-set amount of time to the students exam by clicking on one of the additional time buttons, or you can click on the date and time drop-down to change the end time manually.

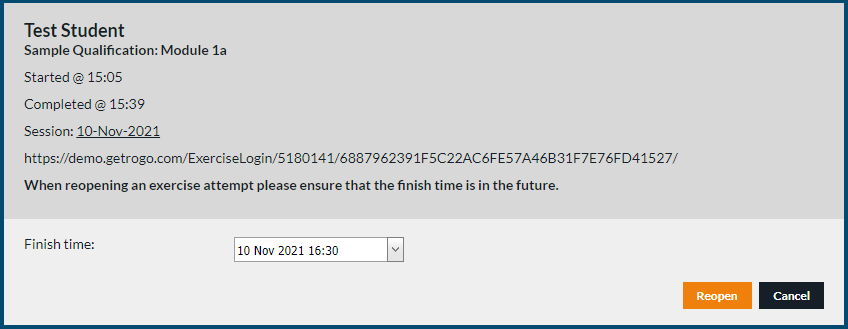
Reopening the attempt
If a student’s exam needs to be reopened, if for example, they ran out of time before their extra time was added, you can reopen the attempt from the same page as above. This can again be reached from the session page, or by viewing the marking overview screen for their attempt and clicking on attempt details. Make sure you also amend the end time of the attempt when you reopen it (same process as above). 
Pausing in Sessions
Pausing enables administrators to address any unforeseen circumstances during assessment, therefore minimising any disruptions that may compromise the fairness of the student’s assessment experience.
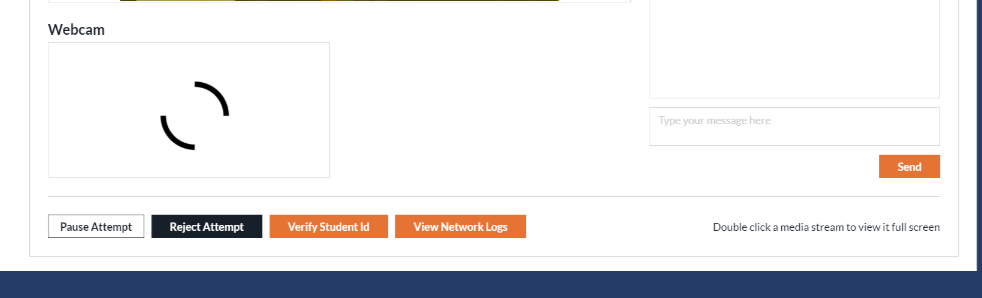
Pausing from the admin side is only available in live invigilation circumstances, from test centre exam sessions and from the live remote invigilation screen.
For test sessions, go directly to the Test Session area in admin and click through to the relevant test centre session. When there is a live assessment ongoing, the pause button is found alongside the current controls:

For remote invigilated exams, admins can pause directly from the active room: